Showing posts with label quilting bee. Show all posts

Thursday, November 15, 2012

Another Quilting Bee Block

I just finished making these 2 chevron blocks for Joyce.


I love that Berenstein bears fabric!

Wednesday, October 31, 2012

Another Quilting Bee Block


I made another block for Melissa using this tutorial. The had us not do the diamond in the middle, and the final size was 24.5"x24.5". These blocks really remind me of swoon blocks. I like how it turned out. Melissa sent us all the fabric, except for the gray circles on white background. She wanted the block to be very light, with creams, grays, and ivory. The print I added is Sweetwater's Mama Said Sew collection.


I cannot wait to see what the final result looks like!

Friday, October 26, 2012

Quilting Bee Block

I finished making these two fun blocks for Tiffany using this tutorial. Here are the two blocks:


Don't they look cute together? This gives you an idea of what the final result will look like.


Friday, June 22, 2012

Quilting Bee: June

This month we are making blocks for Becky. She is making a quilt for her son in red and turquoise using two of Aneela Hoey's lines: A Walk in the Woods and Little Apples. This is the block we made. Here is what I made:


I like how they turned out and I can't wait to see a complete quilt. This block was so nice and easy to make! I am kind of thinking of making a quilt from this block myself!

Friday, May 25, 2012

Quilting Bee: April

I finished these blocks a while ago, but I got around to taking the pictures just now. I like the pinwheel. It is such a cute simple design but with so much character!


Saturday, March 31, 2012

Quilting Bee: March

Ashley sent us beautiful Joel Dewberry fabric from his aviary and Heirloom collections asking us to make a square in a square block. After we worked out some confusion as to where the gray was supposed to go, I ended up making the flowing two blocks. I love how they turned out!

This is how the block was actually supposed to look like

This was the other one I wade, that was made incorrectly.

I love these blocks! So simple and easy to put together quickly!

Friday, February 17, 2012

Quilting Bee: Block 10

Kris sent us some fabrics from the Ruby collection to make this very cute block:


It was so easy to make and I love how it turned out!

Monday, January 9, 2012

Quilting Bee: Block 9

Melissa asked us to make a block out of the blue and cream fabrics she sent. She kindly pre-cut all the fabrics, so the block was super easy and fast to make. I like how it turned out!


Sunday, January 8, 2012

Quilting Bee: Block 8

This was my first foray into making a log cabin block. Christina sent all the fabrics. I like how it turned out. I was a bit annoying to make bwcause the logcabin block needs to be ironed after every stitch, and then trimmed, so there was a lot of movement between my sewing machine, my iron and my cutting board, but I can see how if you are making a bunch of those, they are pretty quick to put together if you chain-piece.


Saturday, January 7, 2012

Quilting Bee: Block 7

For this block, Sadie sent us rainbow stripy fabric and assigned us each a color of the rainbow. From those we were supposed to make any pinwheel block measuring 10.5x10.5. I decided to make one of the blocks I made previously for the pinwheel sampler.


Any yellow just happens to be my favorite color! What a great excuse to get some more yellow fabrics for my stash!

Friday, January 6, 2012

Quilting Bee: Block 6

Amber asked us to make a house. The dimensions were up to us, as was the design. I had a lot of fun with this block. It is not like anything else I ever made, and I have to say, I am proud of how it turned out.


Saturday, December 10, 2011

Pinwheel Extravaganza

One of the projects I have been working on, that has been finally revieled, is making blocks for a pinwheel quilt for one of our quilting bee members, whose house burnet down right after we made blocks for her. A lot of people donated charm packs to us to do this and we made pibwheels. Here are the ones I made:

I love how they all look together. In fact I think I will also be making a pinwheel quilt.

Friday, June 24, 2011

Irish Chain Variation Block Tutorial

This tutorial is meant mainly for my Quilting Bee group, as this is the block for my month (July), so I am posting this primarily to simplify all the measurements for everyone. This will be the block we are making:


Supplies:
- Fat Quarter of white fabric with light green dots (will refer to as white)
- either a 10"x10" or 9x11 of light green fabric (will refer to as green)
- 3 10"x10" blocks of blue/brown/darker green fabric (they are mostly prints, so I will refer to them as prints)


Cutting Instructions:
White:
- 4 strips (2 inches wide, about 10" long)
- 16 2"x5" rectangles
Print:
- 5 strips (2 inches wide, about 10" long)
- 17 2"x2" squares
Green:
- 4 strips 8.5"x2"

I cut everything into 2" strips and then cut the smaller rectangles out of those.

Note: I iron my seams open, because I found that you get more precise measurements that way, but you can choose to do whatever works for you.

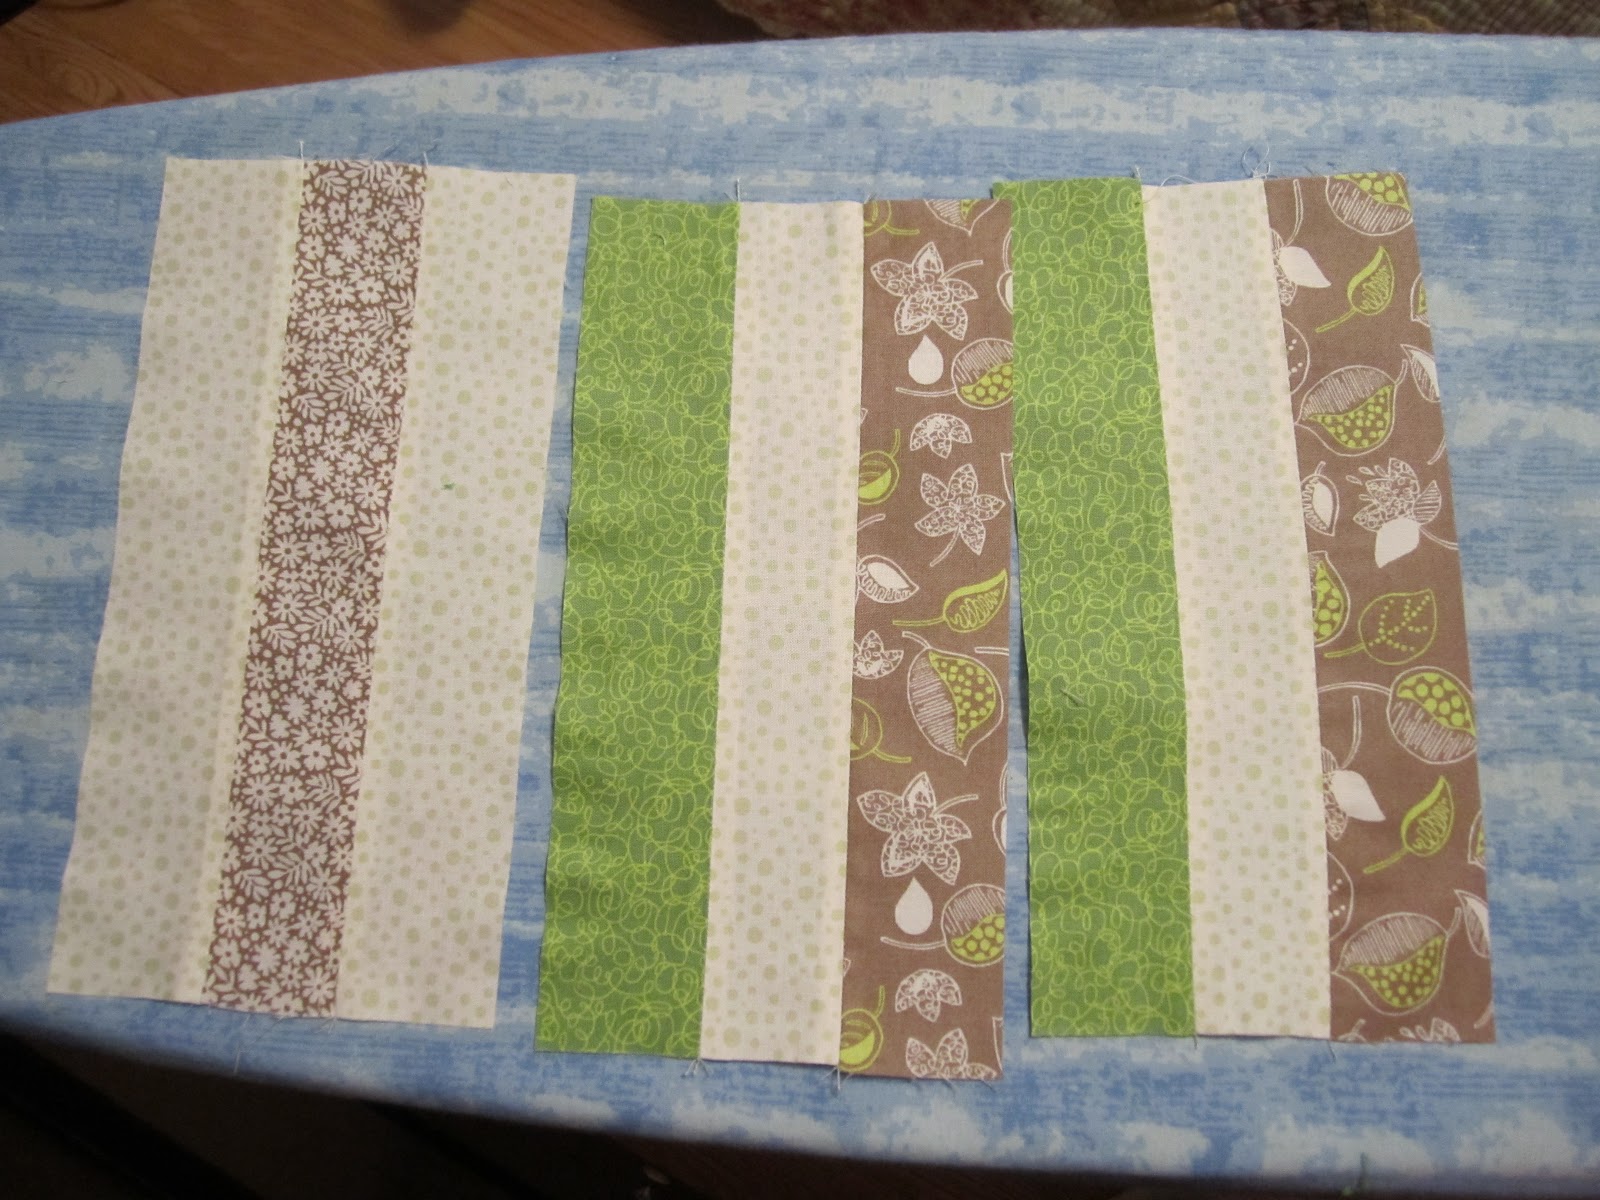
1. Sew the strips together for the 9-patch squares. (This is the strips you cut before, 5 print and 4 white.) You should end up with 2 Print-White-Print and 1 White-Print-White strips, each about 10" long and 5" wide


2. Cut the strip sets into small strips, 2" wide


3. Sew together into 9-patch Blocks so that there are 5 prints and 4 whites in each. Make sure your square is exactly 5"x5", if not you may want to either trim it a bit or make your seam narrower.


4. Sew white pieces onto the square on the right and left side of your 9-patch block


5. Make rectangles that will end up being 8-inches long, with a 5"x2" rectangle in the middle and 2"x2" print squares on either side.


6. Attach the 8" rectangles to the top and bottom of your 9-patch squares. I found that for matching them up, it really helps to pin the seams that are supposed to match up, and if one of the pieces is shorter, just kind of stretch it out....


7. Iron out your resulting squares, and make sure they are exactly 8"x8", trim if necessary. If it is a bit smaller, mark the 7.5" square inside and compensate when attaching the green "sashing"

8. Make 2 rows from blocks you just made of Block - Green sashing - Block, then trim the green strip


9. Make the middle "sashing, by putting a 2"x2" print block, between two green strips and attach it between the two rows you just made. Trim the ends.

And voila! You should now have a 17"x17" inch block!

Thursday, June 2, 2011

Quilting Bee: Block 4

This was another pinwheel block, made modeled after this tutorial. We were sent charm squares (the red fabric), I added the cream. The charm squares were 5"x5". The final square ended up being around 8.75"x8.75". I like the way it turned out. The best part? I made it using my machine and it took me like an hour, as opposed to several days it would have taken me had I done it by hand!

Wednesday, May 25, 2011

Quilting Bee: Block 3

For this block I was going for a windmill square (or a variation of pinwheel). Here is a tutorial. I love the colors of the fabrics and how it turned out, not bad for a first experience working with squares:

Friday, March 11, 2011

Quilting Bee: Block 2

This is the second block I made for the quilting bee. I was going for a vanishing 9-patch, but I cut my squares too small, so it aquired a pseudo-border. I used this tutorial for the vanishing 9-patch.